Strategy Explained
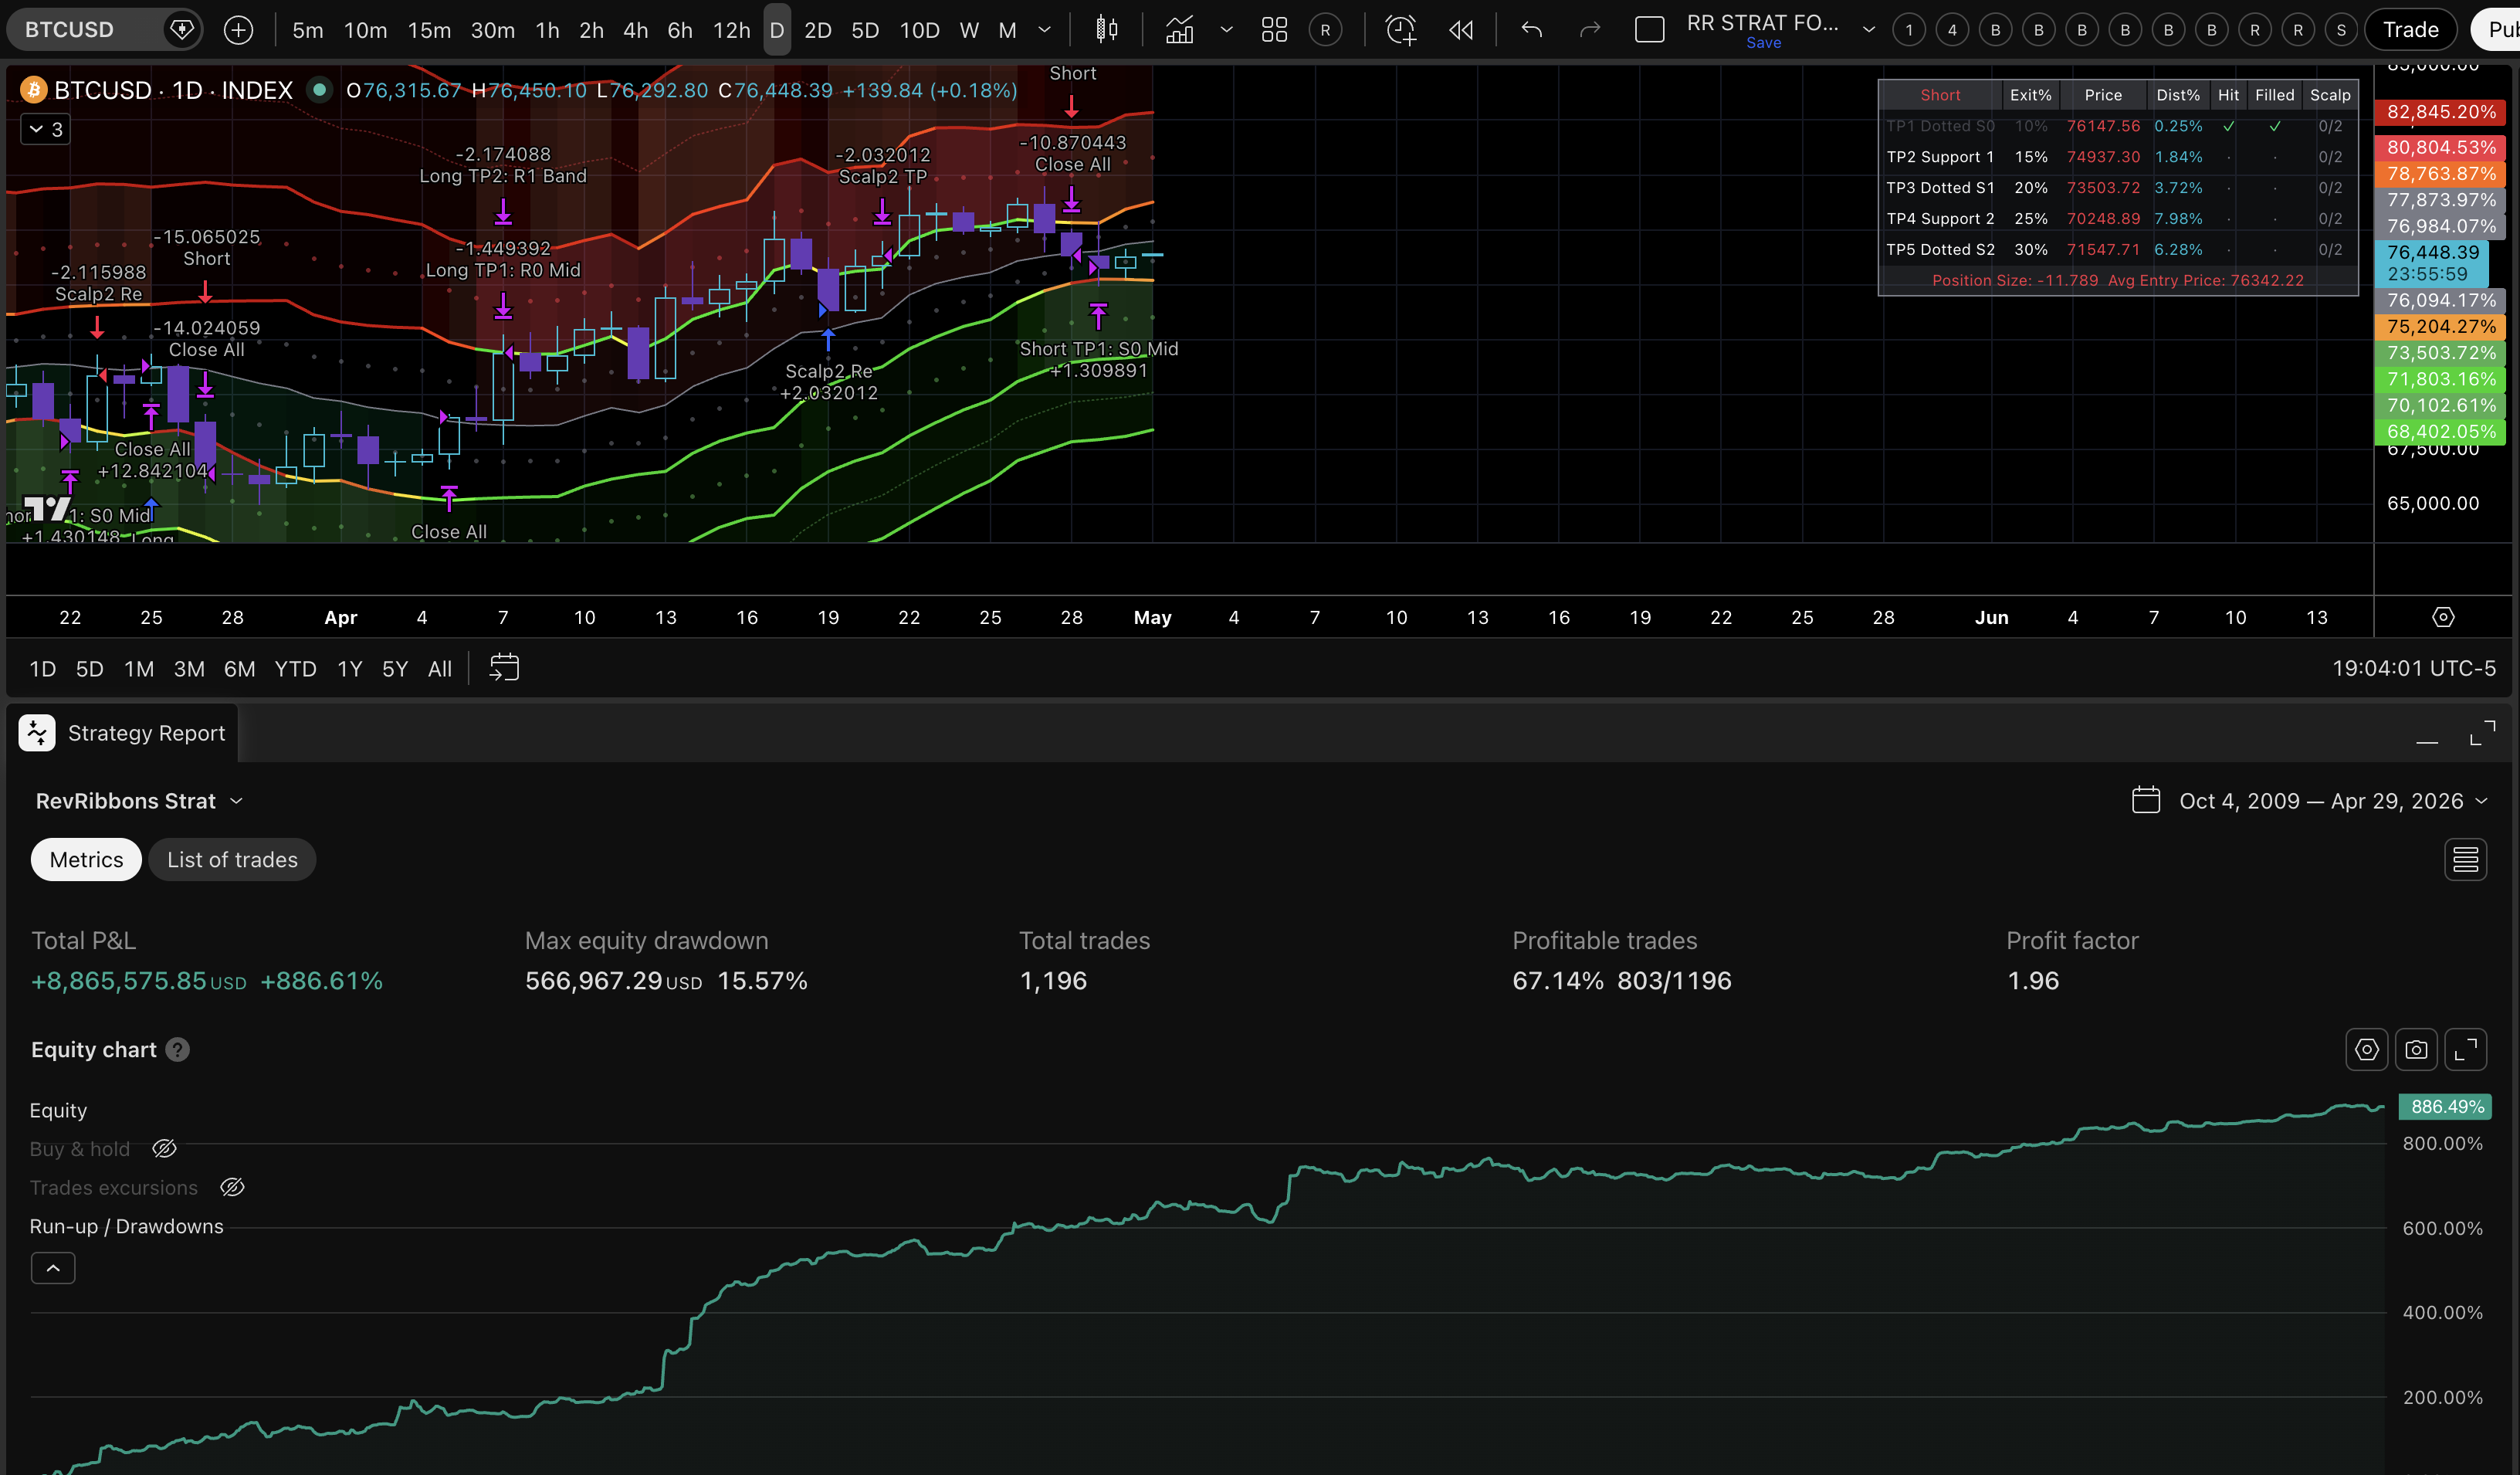
Start Date - Limits the strategy to start at a certain date - this is helpful for looking at more recent history.
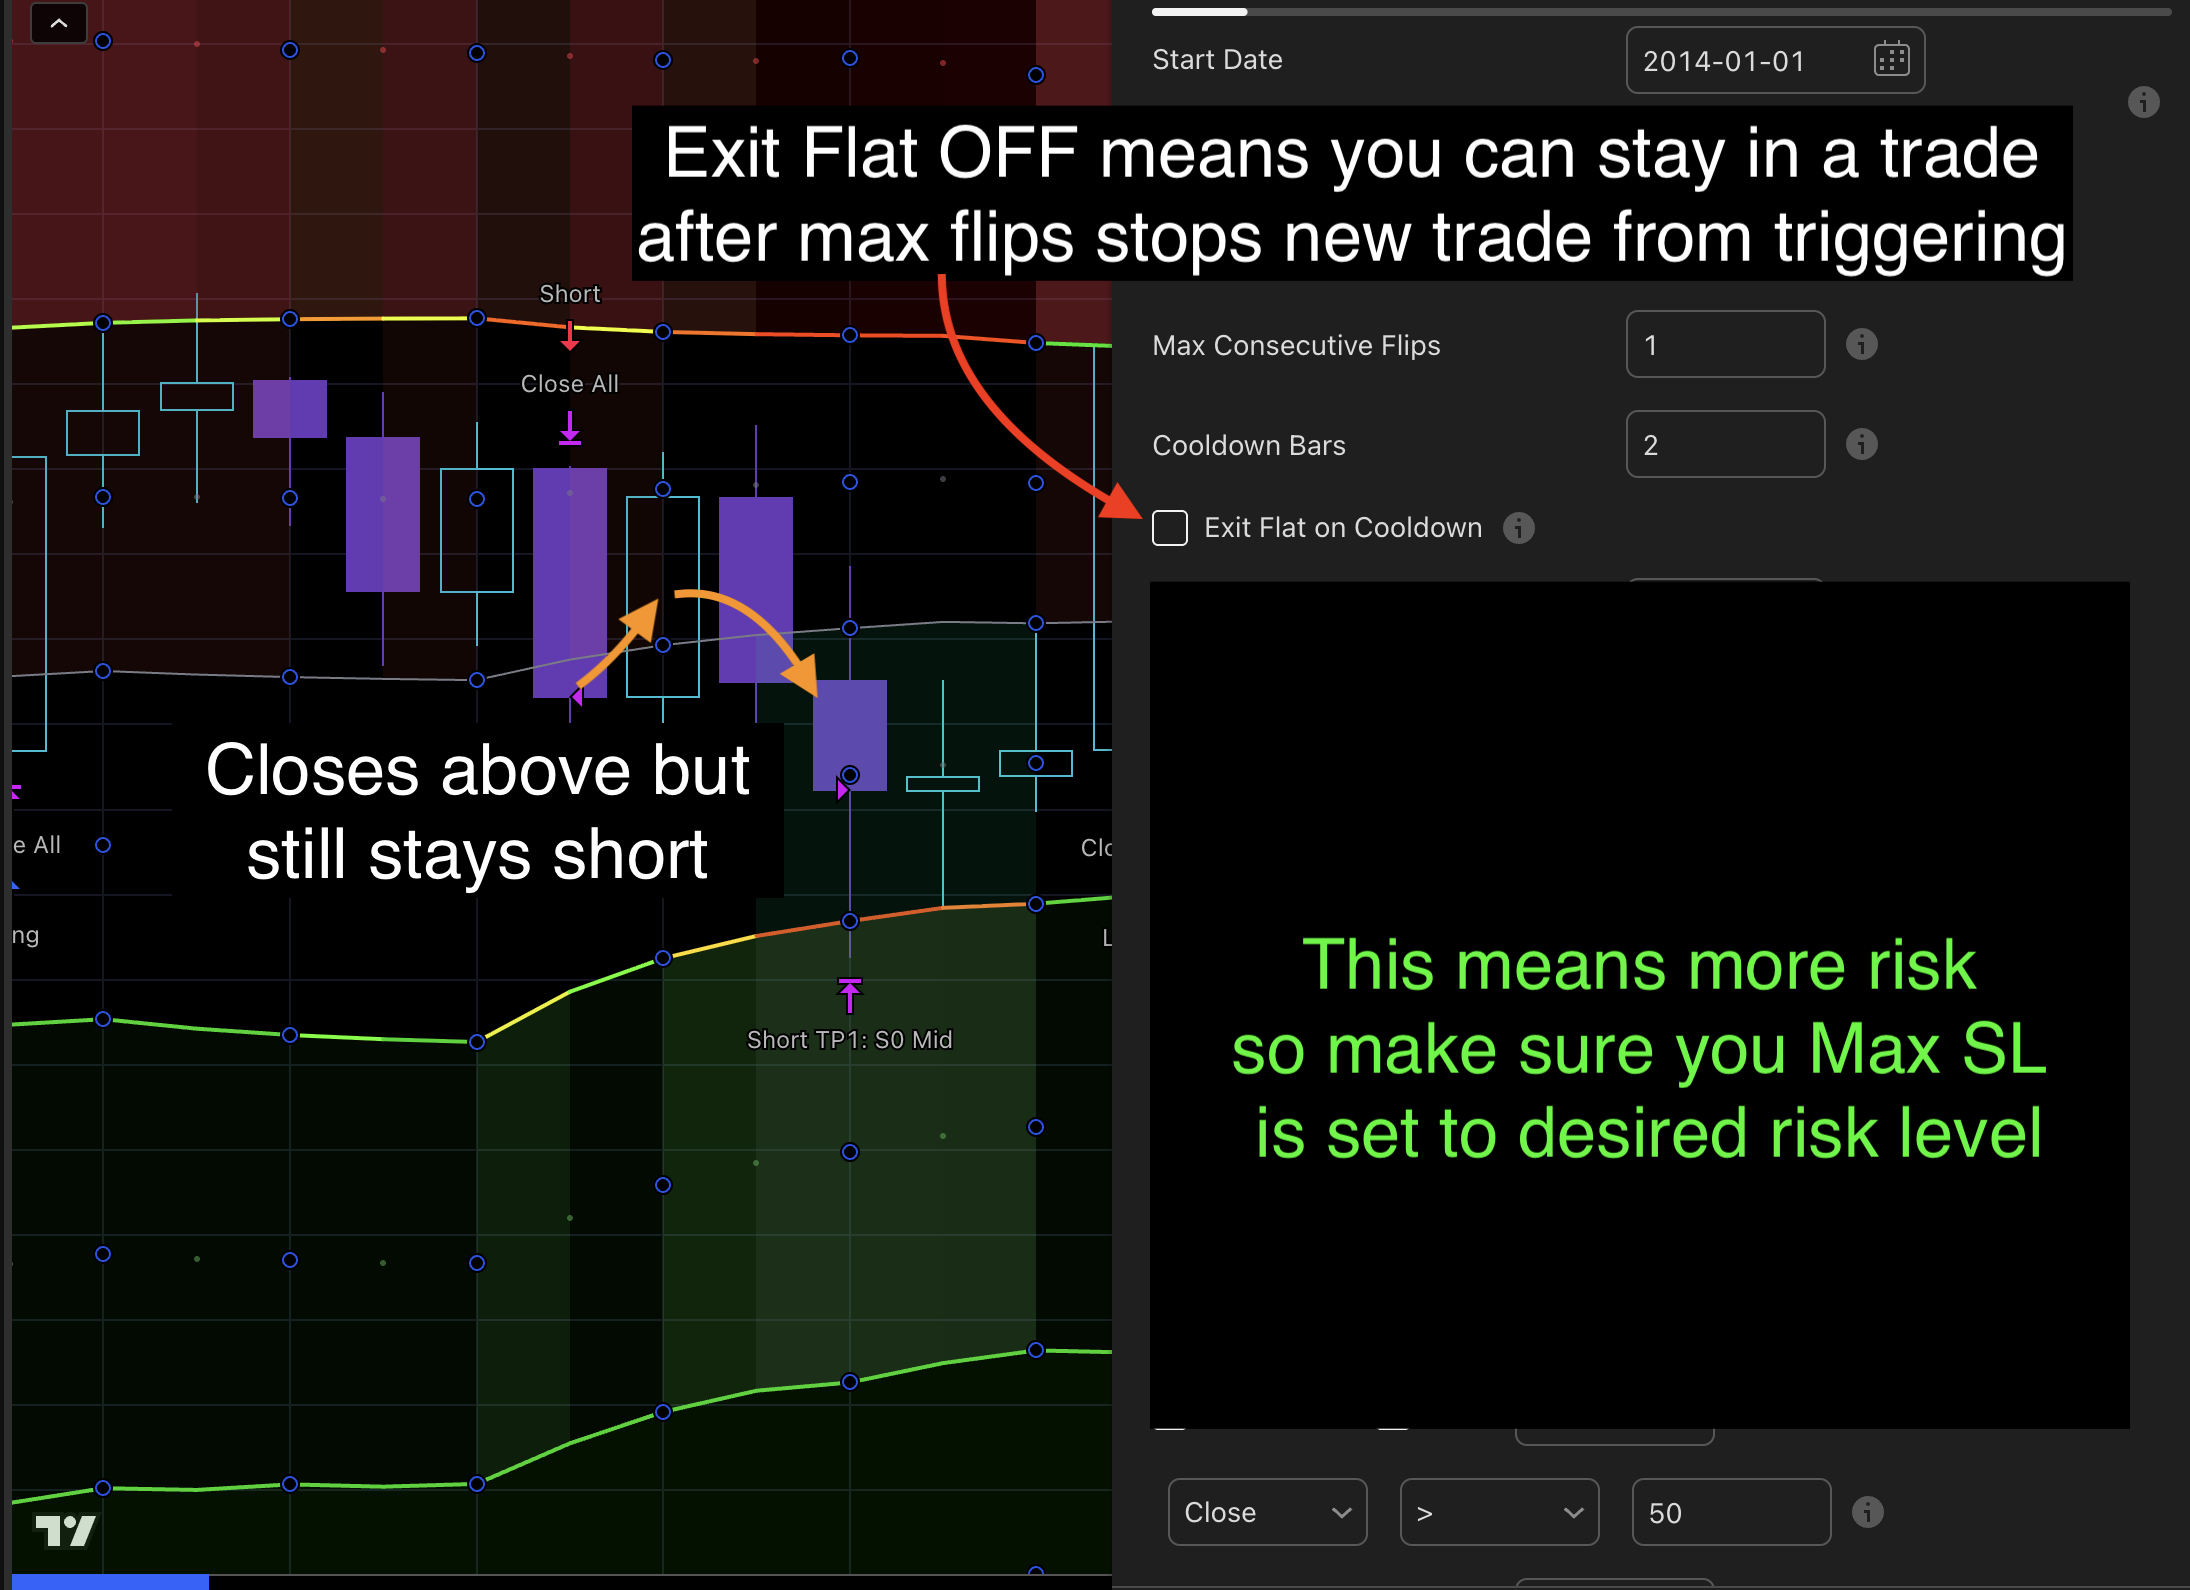
Max Consecutive Flips - Keeps the strategy from flipping directions several times in a row. (this is helpful if price action is choppy)
Cooldown Bars - After max consecutive flips triggers how many bars does the strategy wait before a new trade can enter
(at times this can make entry price worse but it can also help save equity if price action is choppy around the midline so finding a balance is helpful)
Exit Flat On Cooldown - Turing this OFF adds more risk as the trade will stay open even if midline is violated but can also save equity in chop. If you turn this OFF be sure you understand the implications as the trade will remain open past the midline and will use the values in the RISK boxes at the bottom of the indicator as the emergency exit
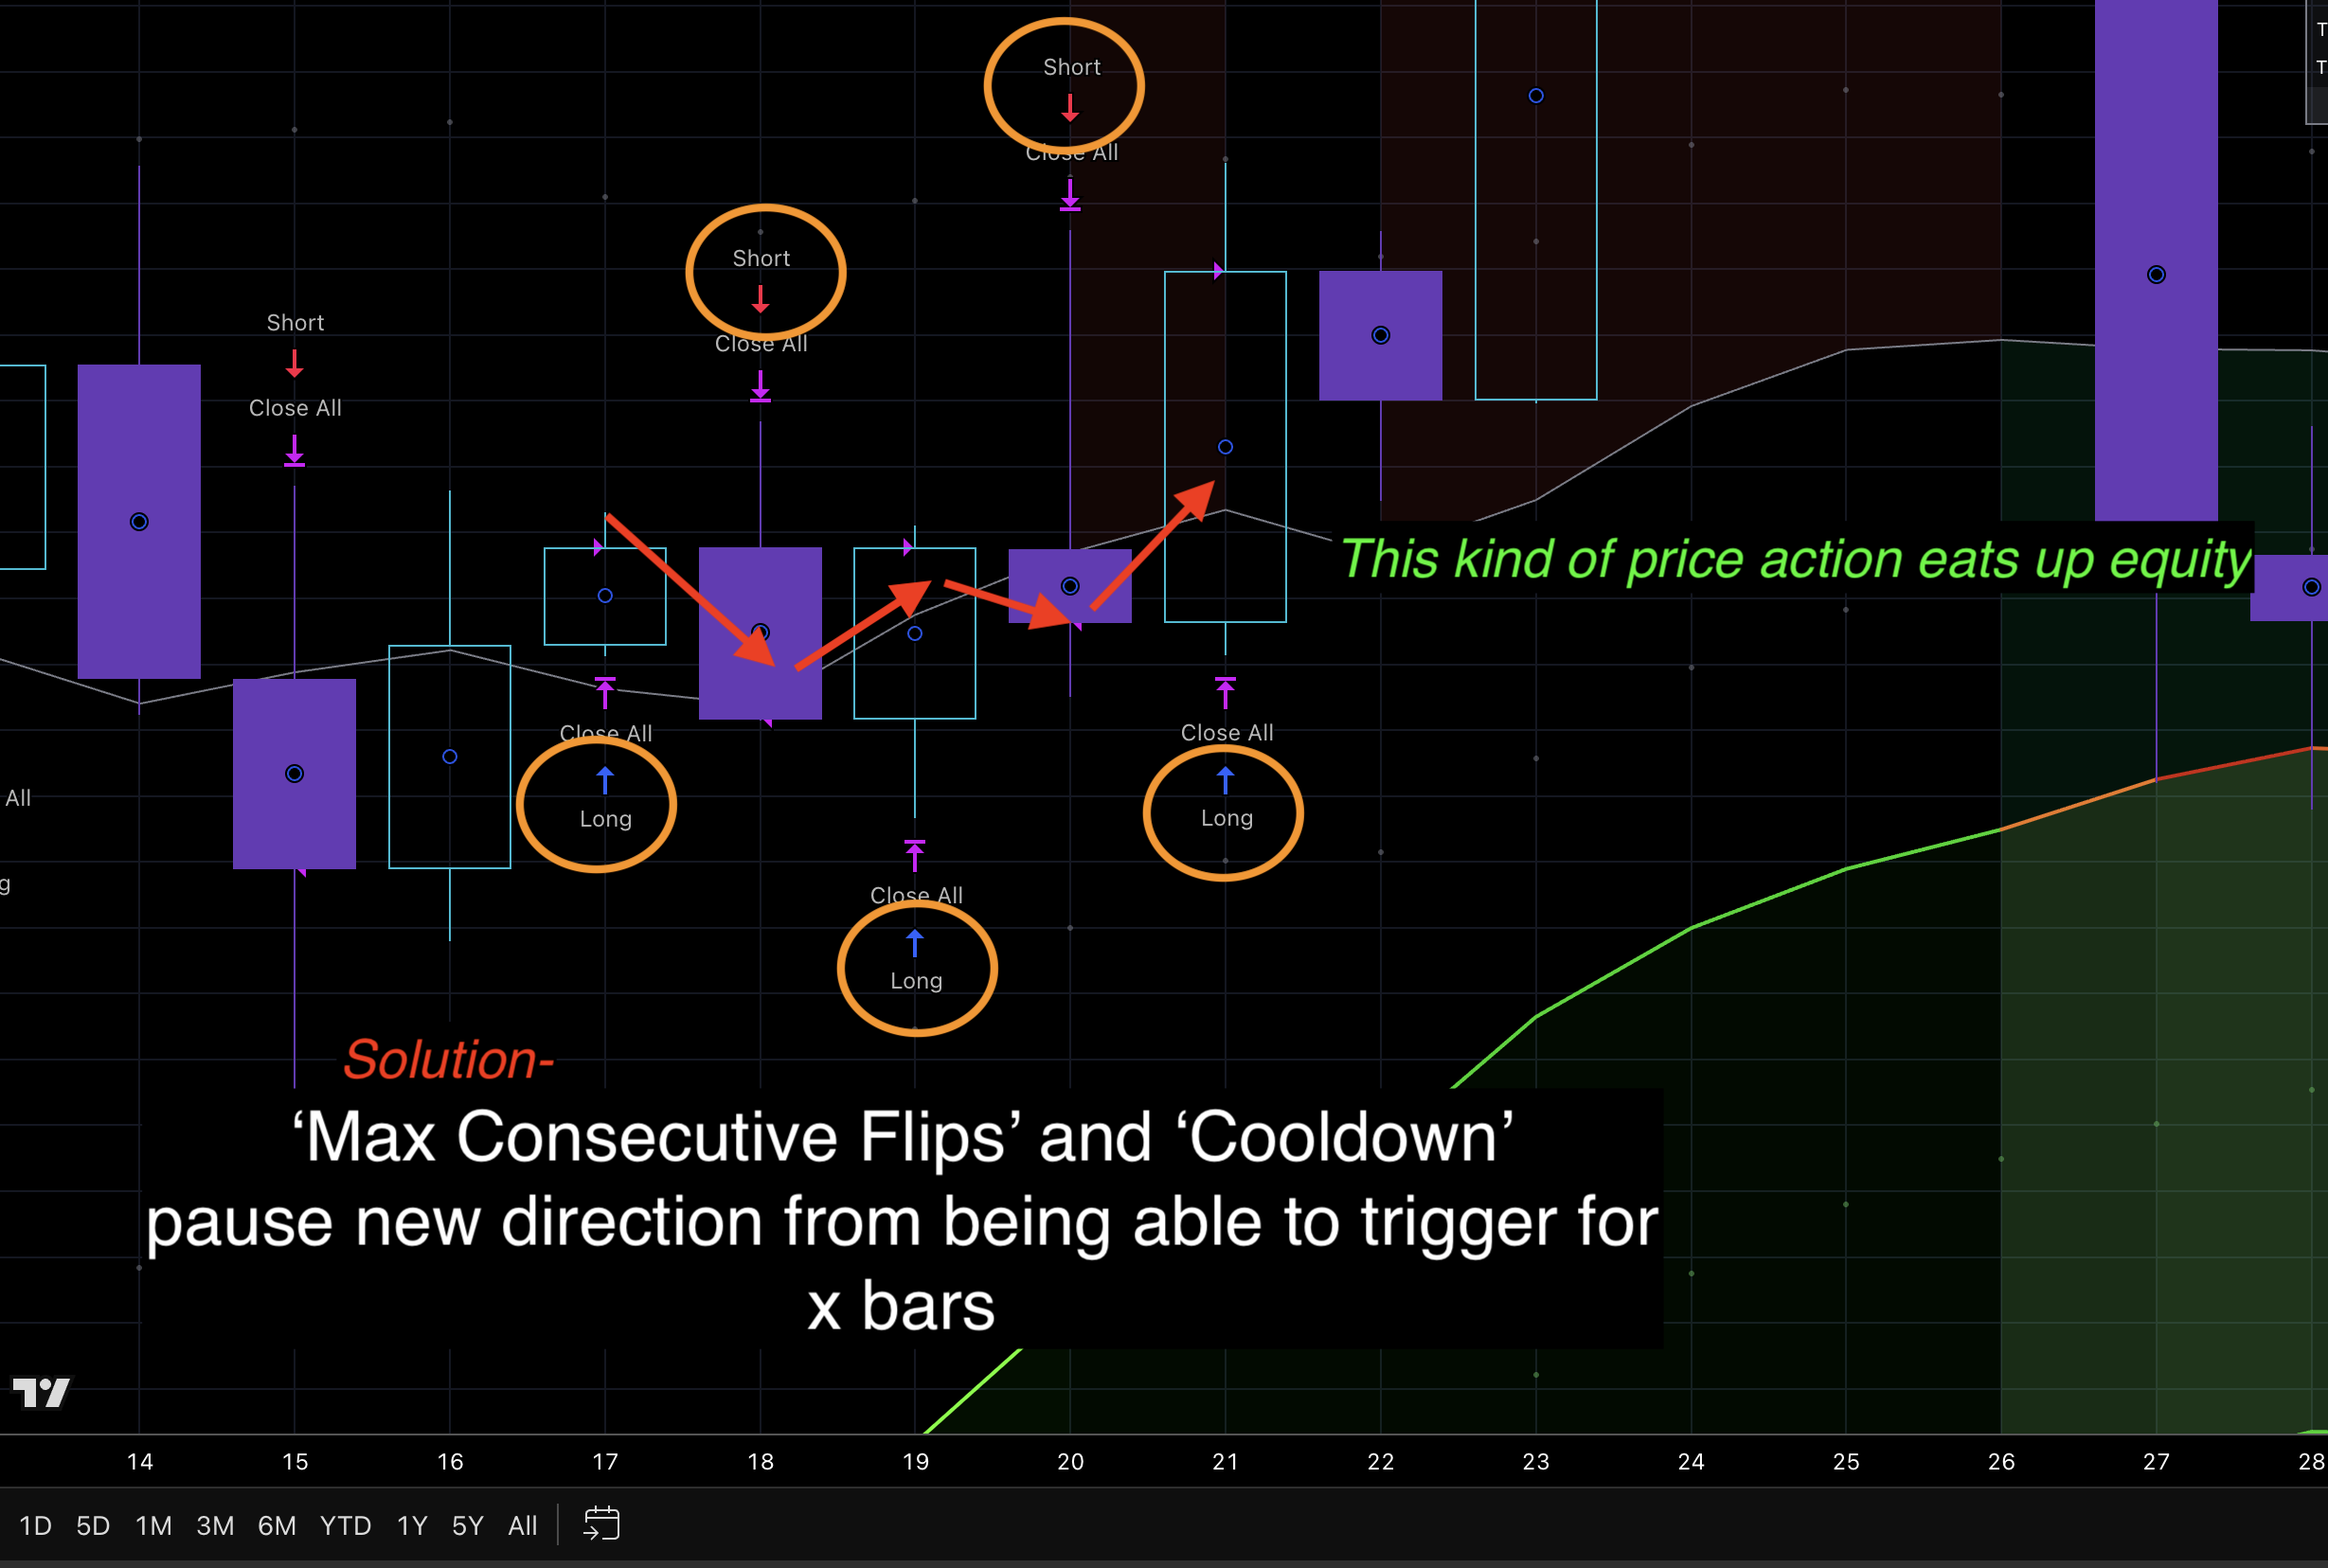
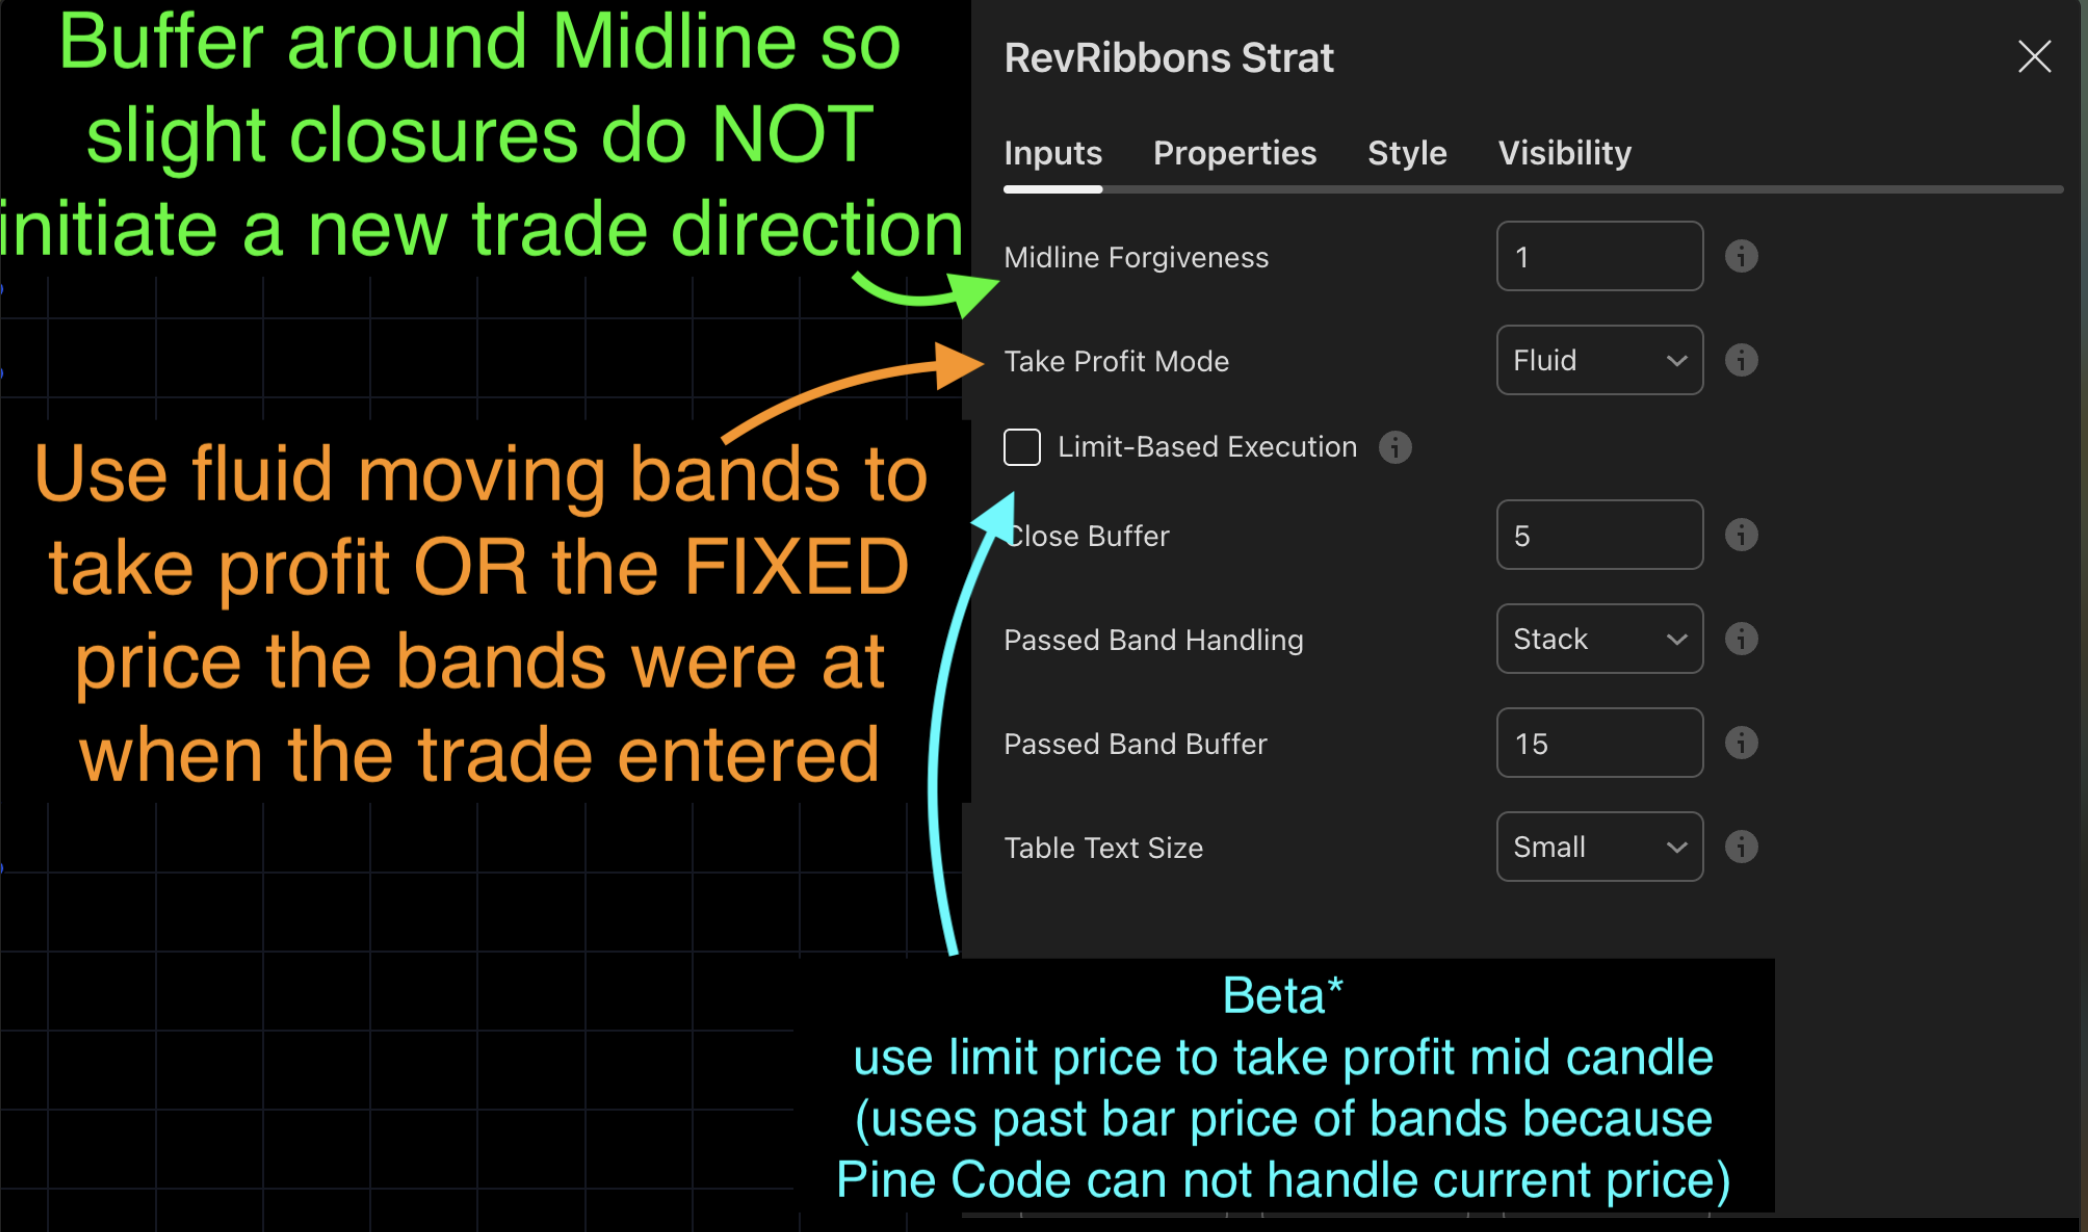
Midline Forgiveness - allows a trade to NOT switch directions or execute if price barely passes the midline. If you are wanting to filter out direction flips this is one way to do it.
note - the number in the box is a percentage of the width of the bands not a hard percentage.
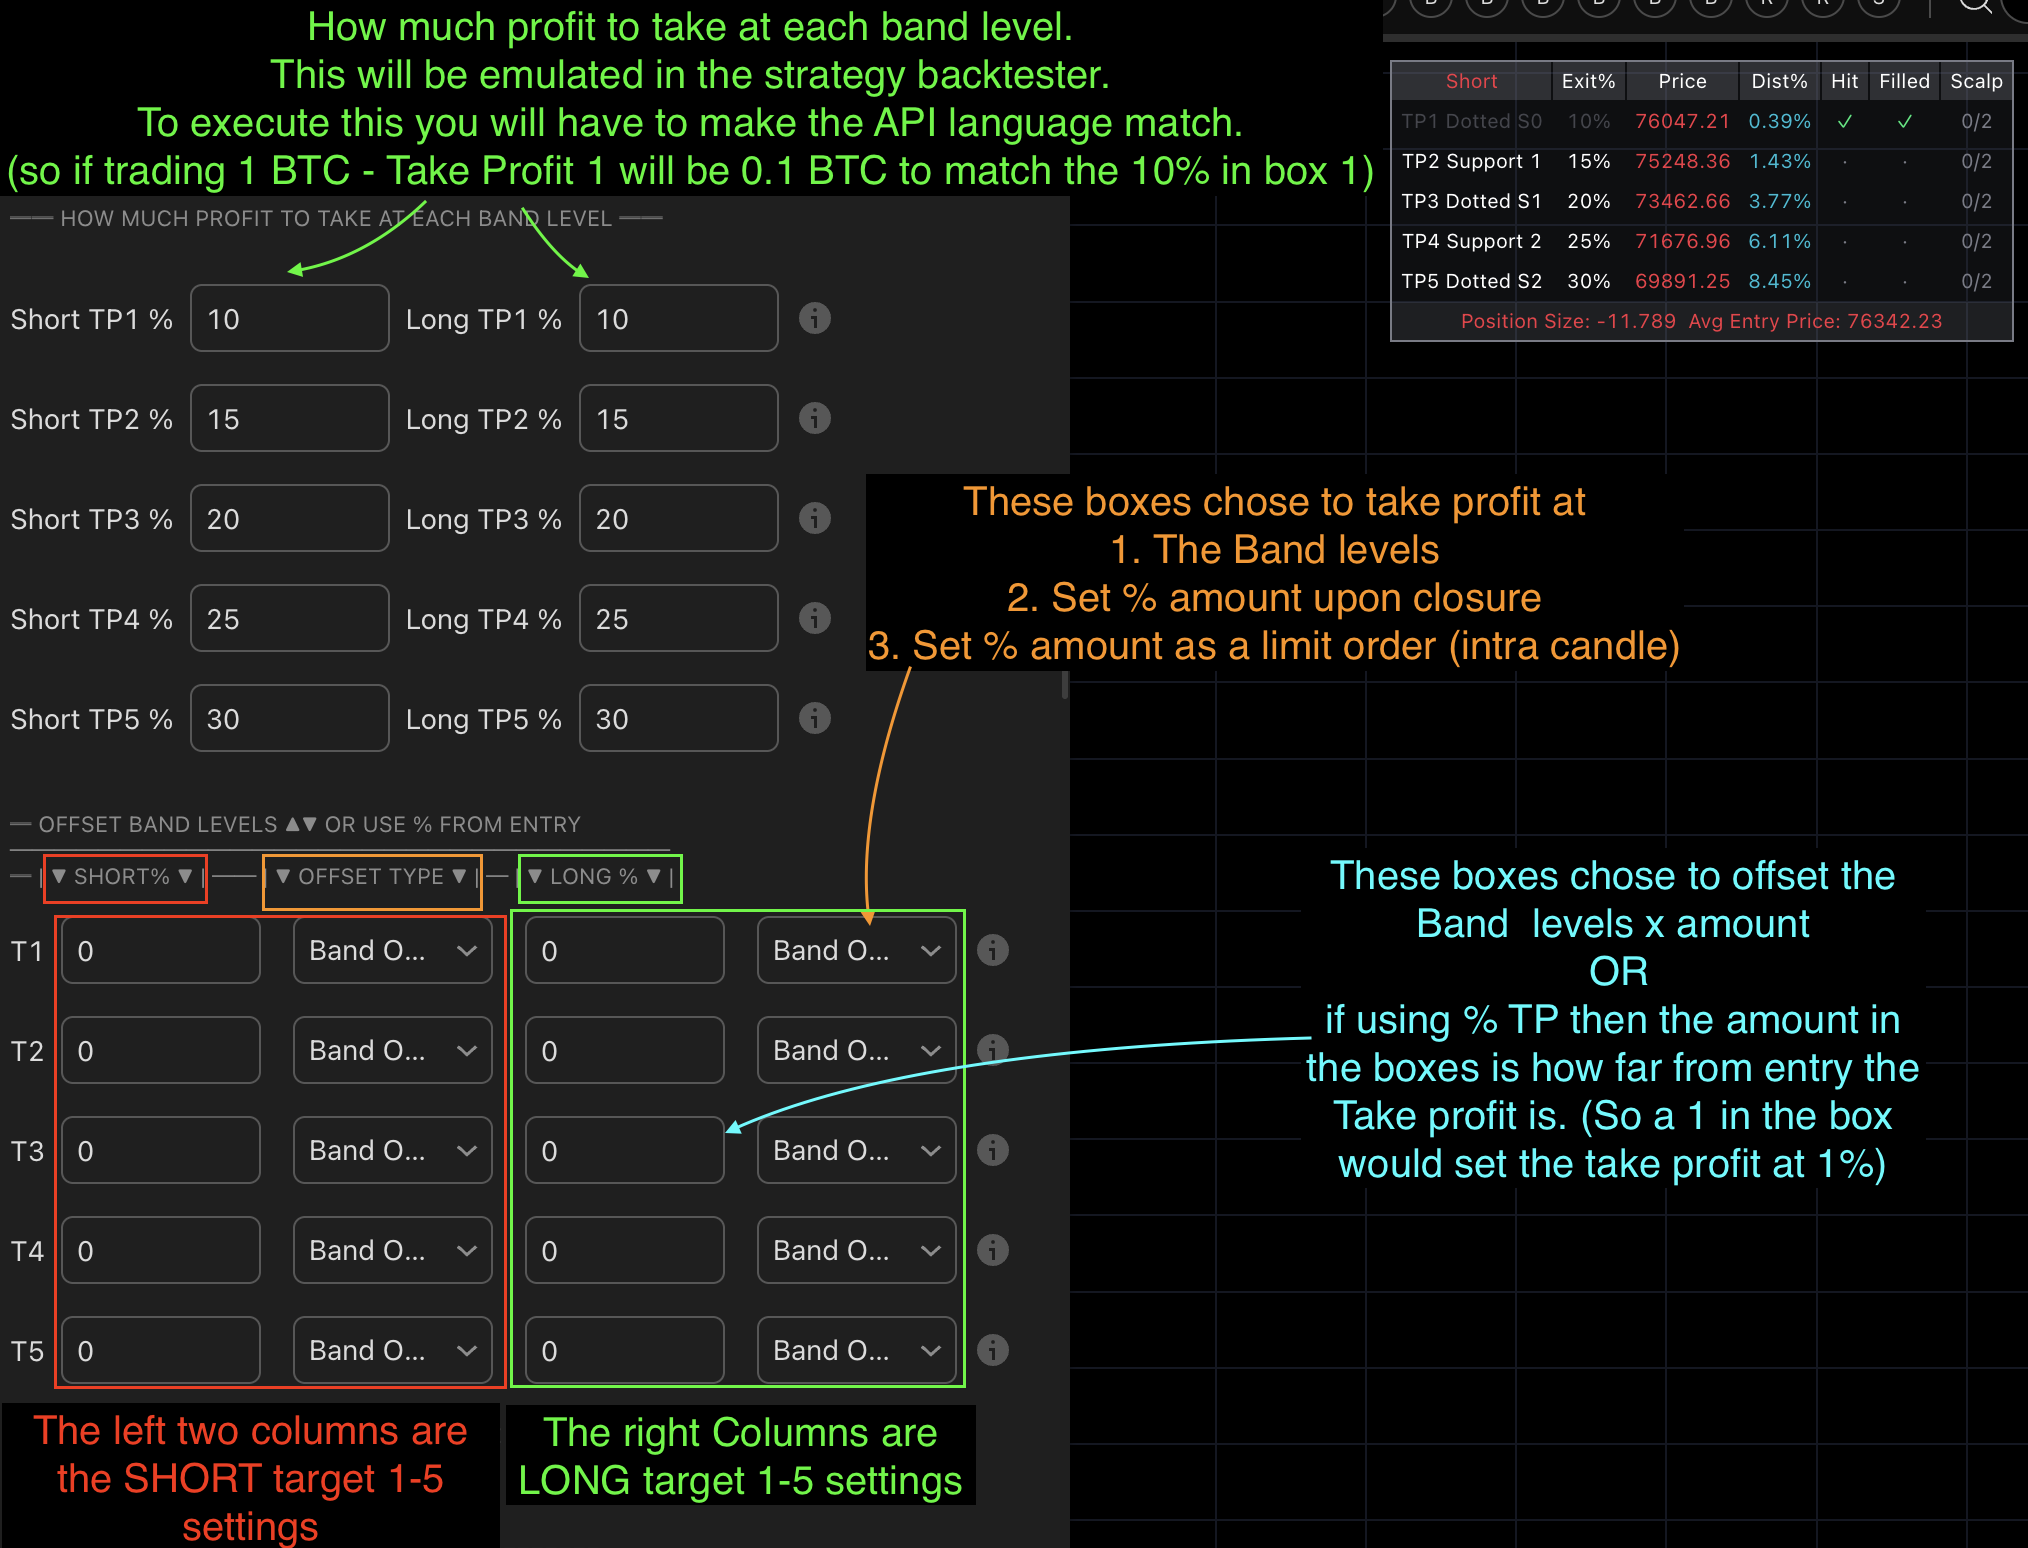
Take Profit Mode - there are two ways to take profit on trades. FLUID is using the price of the fluid bands as they dynamically change overtime. FIXED is the exact price of each band upon trade entry. (Example if a long trade enters and R0 band (first TP) is 2% above the entry price upon trade start the TP1 will be 2% and so on for the follow bands above that)
Limit-Based Execution - This is still in beta so use with caution. Trading view will allow intra bar fills ONLY if we use the value of the band on the PREVIOUS bar. So we can choose to take profit as a limit style order intra bar instead of waiting for close above the target. This works only when on FLUID mode.
(example each new bar the code looks at the previous value of each remaining take profit and if anytime in the current bar one of those levels is hit the strategy will exit immediately.)
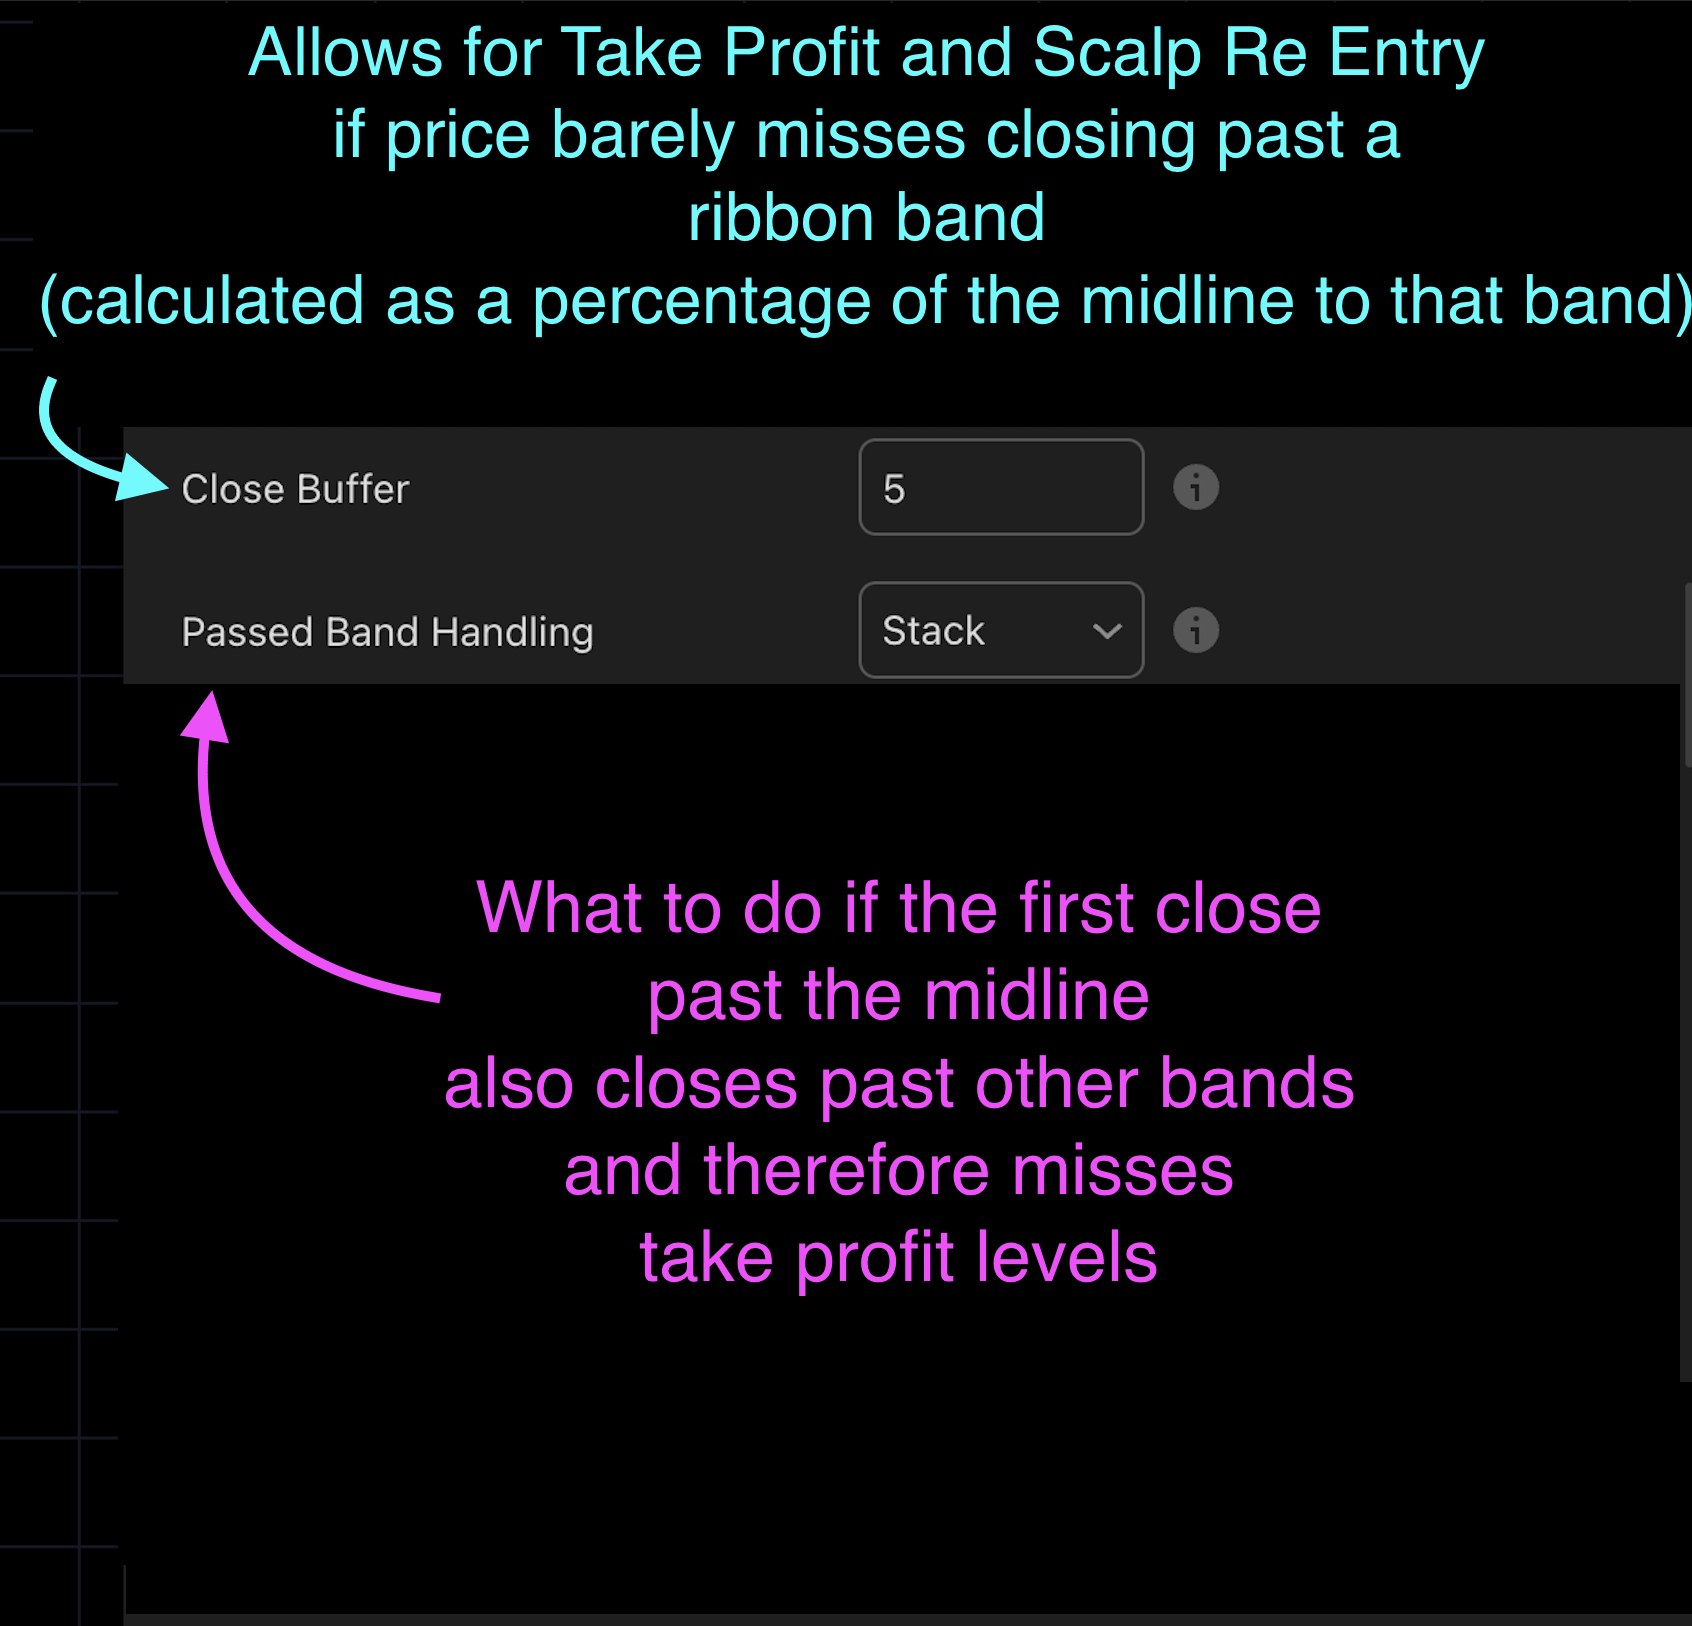
Close Buffer - An extra buffer to take profit early if price just barely closes SHY of the needed level. Again using a percentage of band width not a hard percent value.
Past Band Handling - There will be times price closes past the midline AND one or more of the take profit levels in the same closure. In these cases before the trade even triggers TP 1 and possible TP 2 (ect) have no exit price.
-
STACK - The next take profit that is viable will now take profit for any past targets.
If Tp 1 and 2 are passed upon trade open then TP 3 will now TP for 1,2 and 3 -
SKIP - The trade will not enter the full amount instead it will only enter for the value of the open take profits.
If Tp 1 is passed upon trade open and TP 1 is 10% then the trade will only enter at 90% of the size. (note: the back-tester will show the results but there is not an easy way to execute this in the API fields as of now)
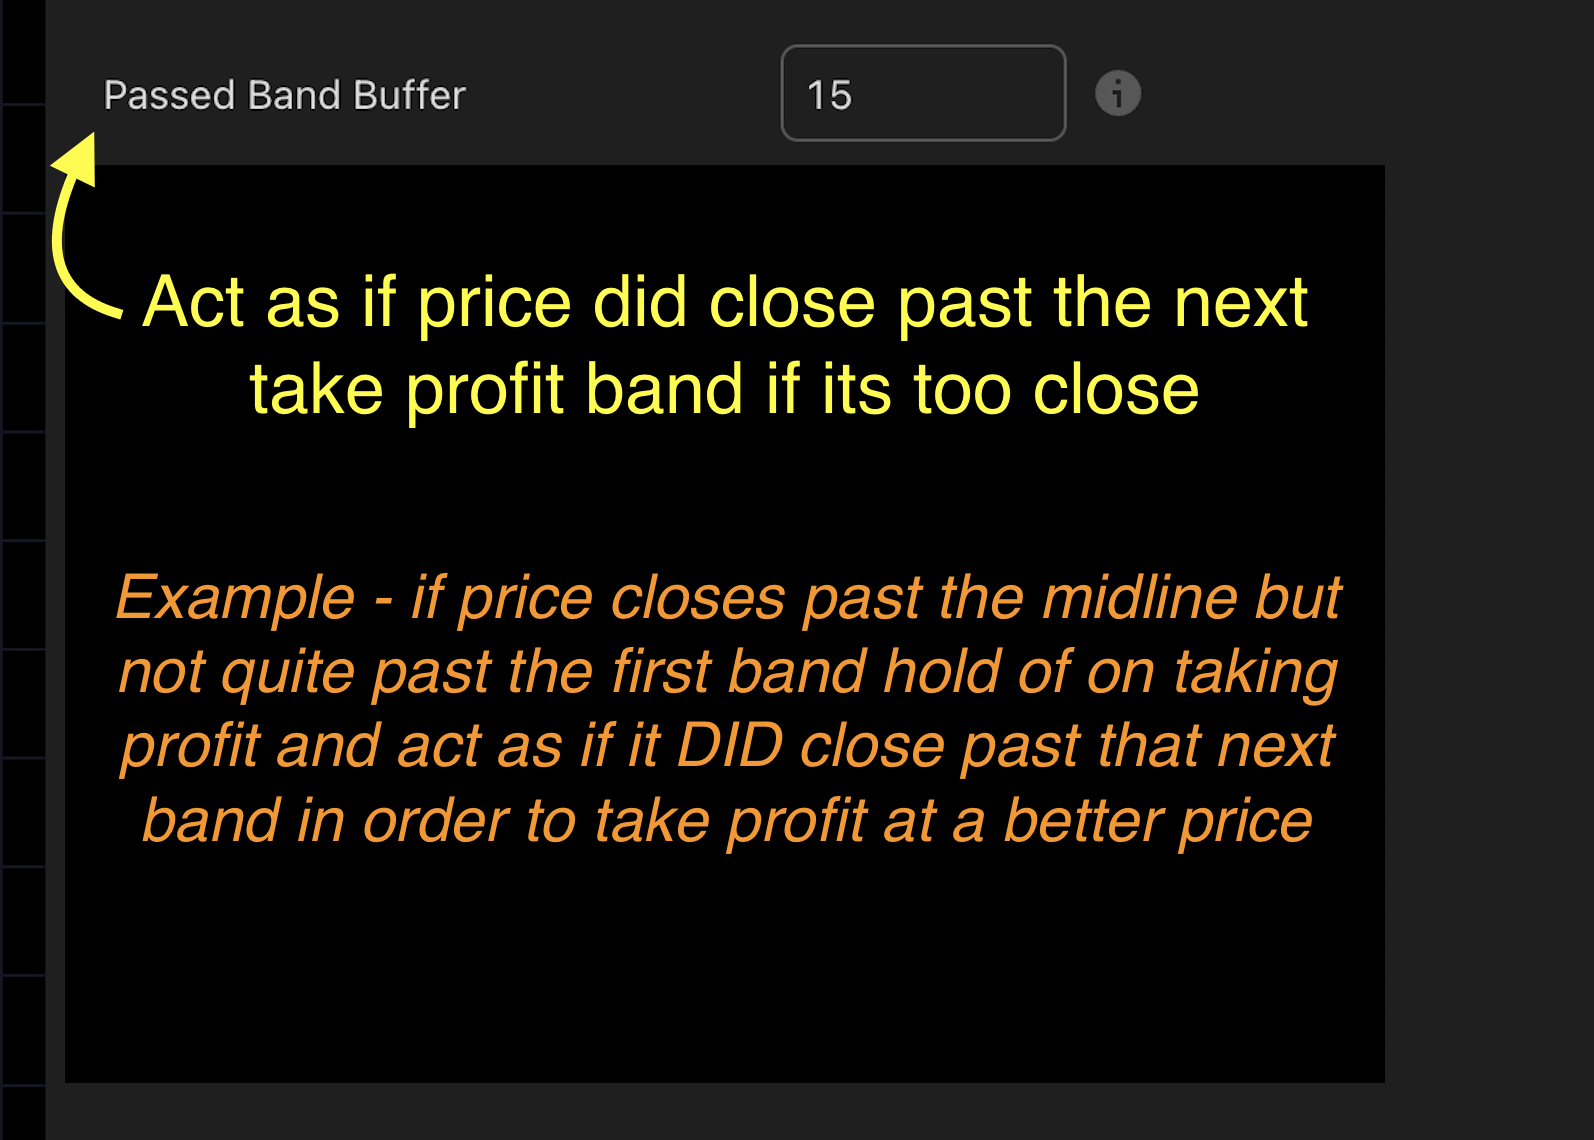
Past Band Buffer - Applies to past band handling -act as if band is passed even if its just barely shy of the band level. Uses a percent of band width.
(example: if price passes past the midline and just barely under TP 1 it may not be worth taking profit of a very small amount so we can act as if price DID pass the target 1 and STACK or SKIP.)